
This is the third blog post in my "terrain mapping with three.js" series. With the terrain geometry in place, it's time to create a texture and drape it over the terrain.
In the first blog post in this series, we created a digital elevation model (DEM) for Jotunheimen. We can use this DEM to create color relief and hillshade that will enhance the view of our terrain (this blog post explains the details).
gdaldem color-relief jotunheimen.tif color-relief.txt jotunheimen-relief.tif

Creating nice-looking hillshades got easier with GDAL 1.10. By adding the "combined" option to gdaldem you get a slope-enhanced shaded relief:
gdaldem hillshade -combined jotunheimen.tif jotunheimen-hillshade.tif

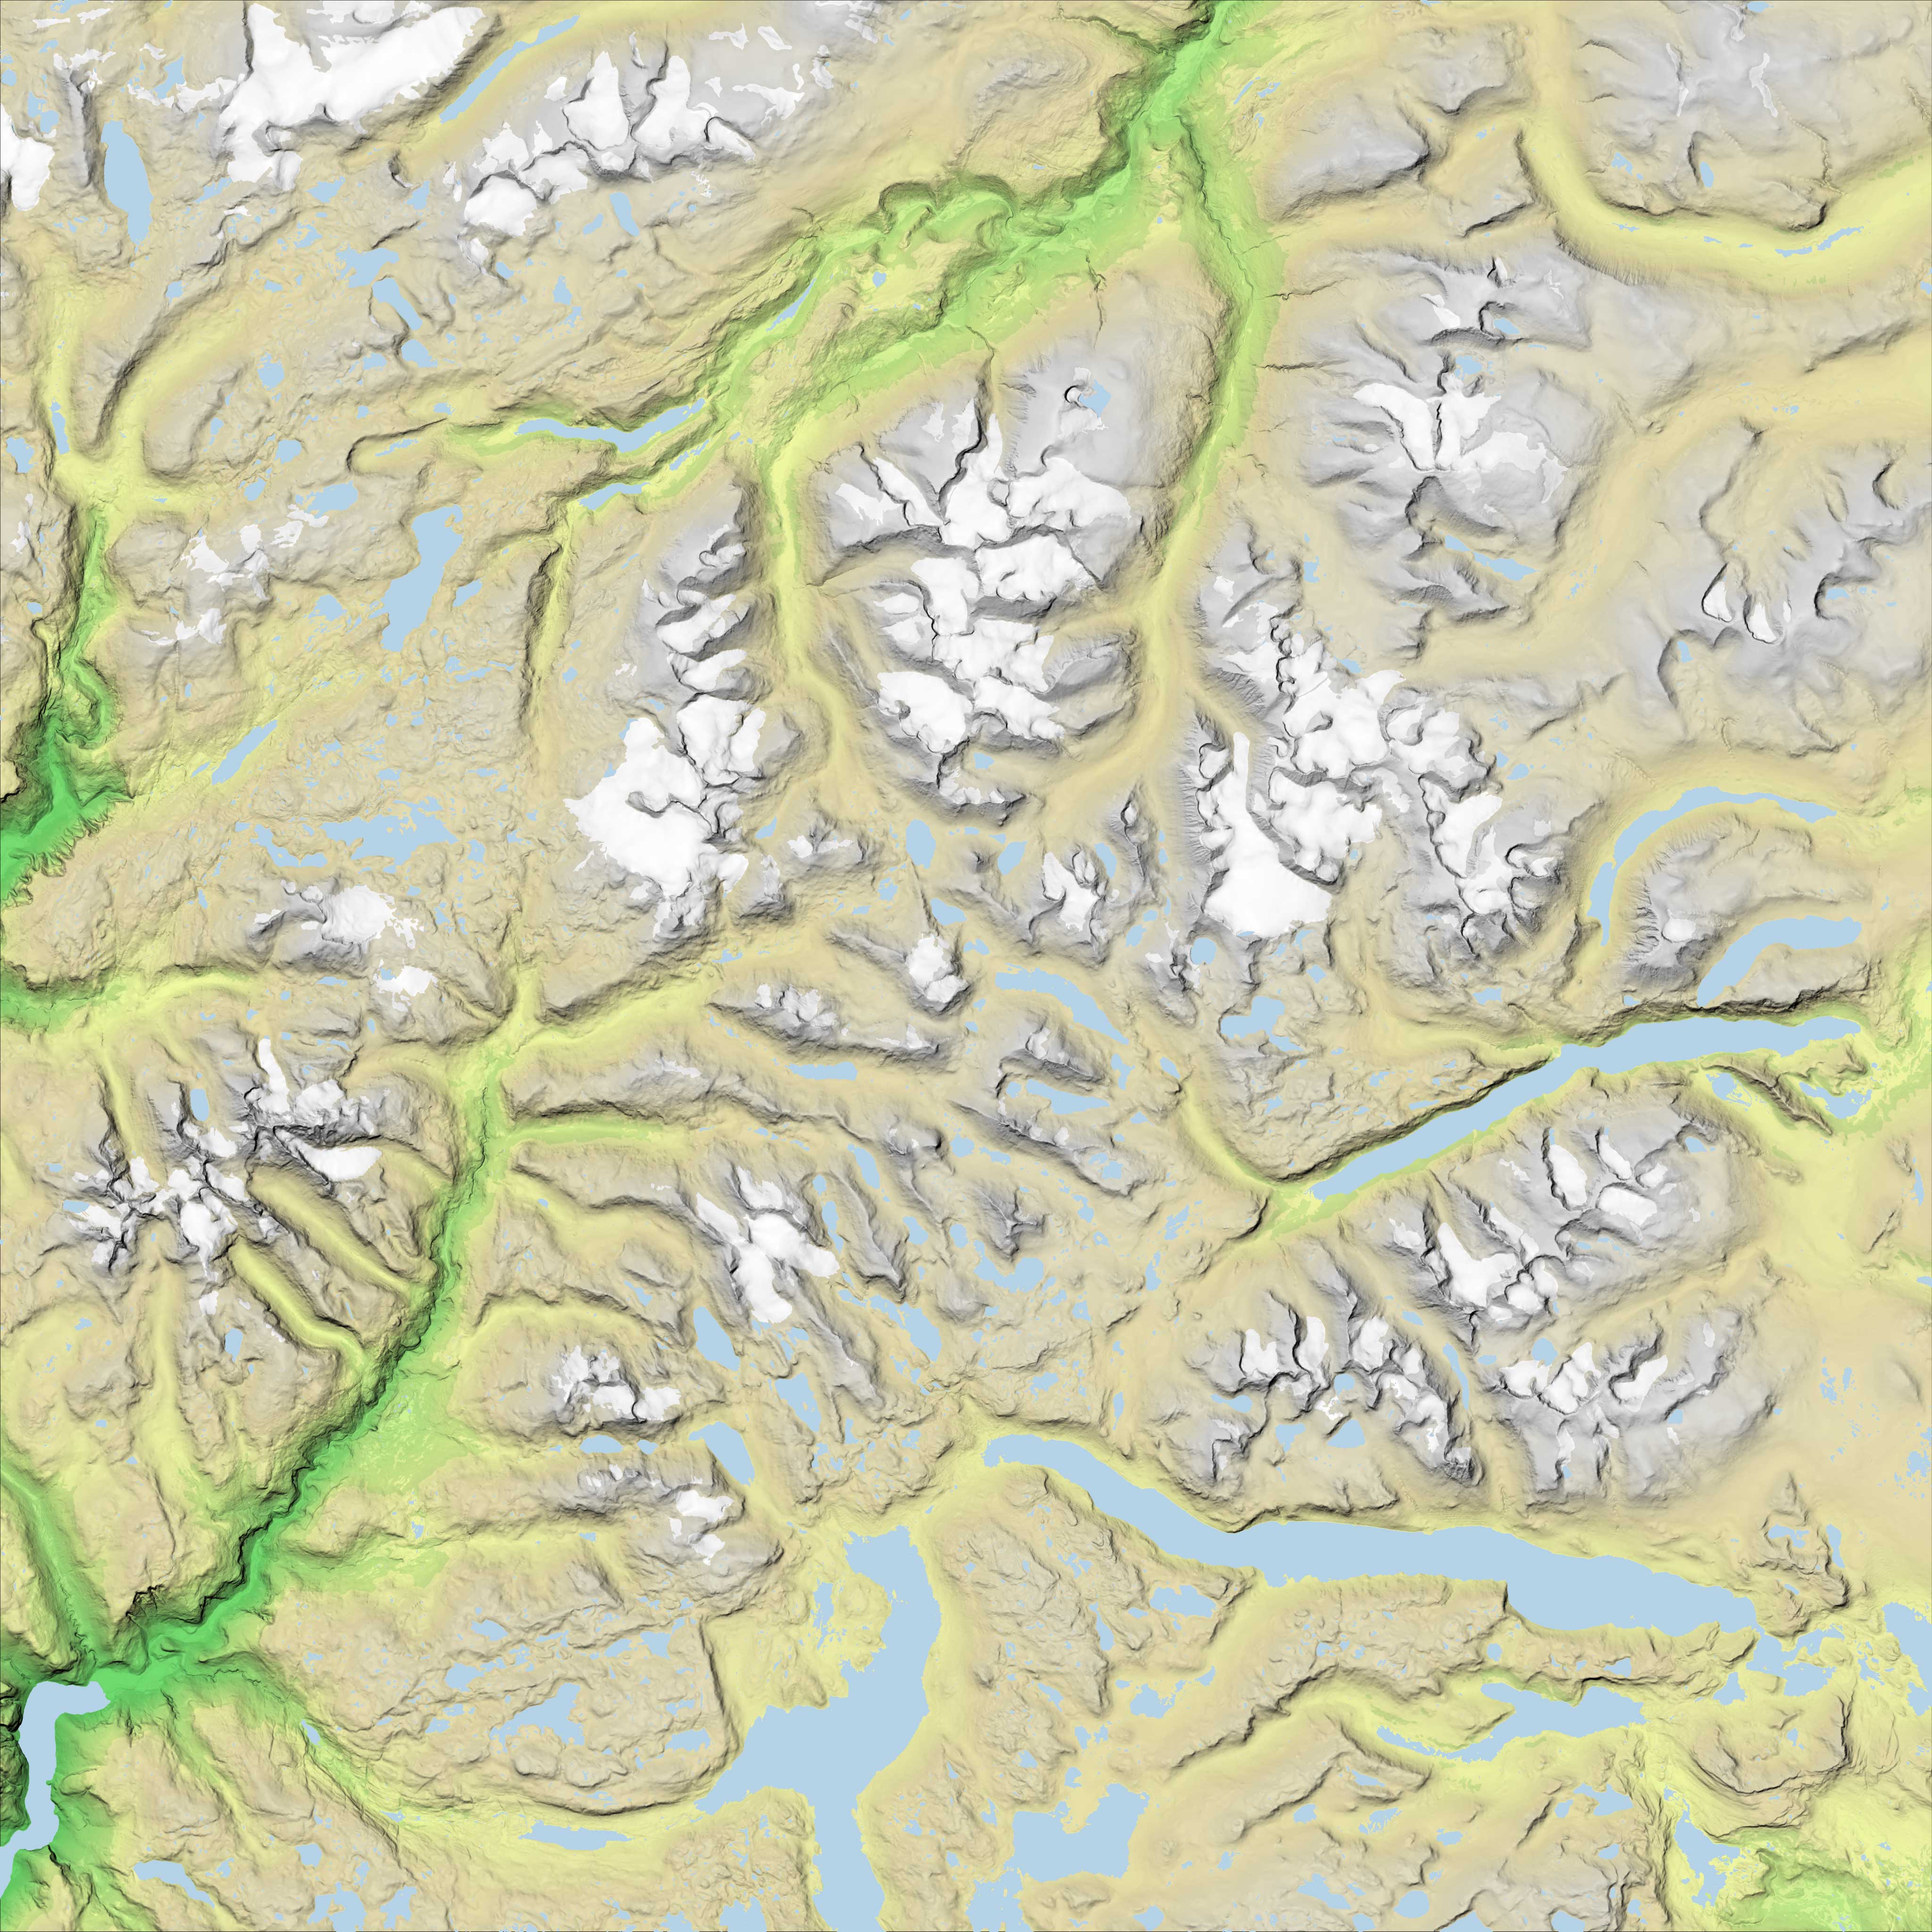
I'm combining color relief and hillshade with Mapnik, and at the same time adding colors for lakes, glaciers and trees using open data from the Norwegian Mapping Authority (this blog post explains the details).
nik2img.py jotunheimen-texture.xml jotunheimen-texture.png --projected-extent 432000 6790000 492000 6850000 -d 4096 4096
The texture styles are available on GitHub. The final texture (converted to JPG to save some bandwith) looks like this:

Adding the texture to the terrain mesh is dead easy: Use THREE.ImageUtils.loadTexture to load the texture and add it to the map property of the material:
var material = new THREE.MeshPhongMaterial({
map: THREE.ImageUtils.loadTexture('../assets/jotunheimen-texture.jpg')
});
We also need to add some light to see the texture:
scene.add(new THREE.AmbientLight(0xeeeeee));
That's all! Our 3D terrain now looks like this (click to see in WebGL):
The code is available on Github. In the next blog post, we'll create a virtual reality version of our terrain.
In the first blog post in this series, we created a digital elevation model (DEM) for Jotunheimen. We can use this DEM to create color relief and hillshade that will enhance the view of our terrain (this blog post explains the details).
gdaldem color-relief jotunheimen.tif color-relief.txt jotunheimen-relief.tif

Creating nice-looking hillshades got easier with GDAL 1.10. By adding the "combined" option to gdaldem you get a slope-enhanced shaded relief:
gdaldem hillshade -combined jotunheimen.tif jotunheimen-hillshade.tif

I'm combining color relief and hillshade with Mapnik, and at the same time adding colors for lakes, glaciers and trees using open data from the Norwegian Mapping Authority (this blog post explains the details).
nik2img.py jotunheimen-texture.xml jotunheimen-texture.png --projected-extent 432000 6790000 492000 6850000 -d 4096 4096
The texture styles are available on GitHub. The final texture (converted to JPG to save some bandwith) looks like this:

Adding the texture to the terrain mesh is dead easy: Use THREE.ImageUtils.loadTexture to load the texture and add it to the map property of the material:
var material = new THREE.MeshPhongMaterial({
map: THREE.ImageUtils.loadTexture('../assets/jotunheimen-texture.jpg')
});
We also need to add some light to see the texture:
scene.add(new THREE.AmbientLight(0xeeeeee));
That's all! Our 3D terrain now looks like this (click to see in WebGL):
 |
| View of Jotunheimen from the south. |
 |
| View of Jotunheimen from the north. Galdhøpiggen, the highest mountain in Norway (2469 m), is among the glaiers in the middle. |
The code is available on Github. In the next blog post, we'll create a virtual reality version of our terrain.
Comments
keep posting!
Bjørn, thank you again for such an excellent guide.
geometry.computeCentroids();
geometry.computeFaceNormals();
geometry.computeVertexNormals();
Thanks in advance